terça-feira, 9 de outubro de 2012

Neon: Trend 2013

Summer is all about bright colors and bold prints. So, it is time to abandon the dark clothes and heavy winter and go for something colorful and modern. 
This trend is chic, bold and extremely wearable. 
I already gave myself to fashion, I love these bright colors, I think the very face of summer. And you can use neon both day and night. 
Create a chic look to desdo more relaxed! 
Check out some of the neons that you can add to your look and Shine around! 

Let's start with the shirts and get inspired ...


Tops, loved this little mustache of the Victoria Justice

Pants are great neon requested


Shorts Neon perfect for parading in the summer!


Short dresses all have a charm ...

Long dresses,so chic!


Jackets are perfect for a fresh afternoon


Loved this look! Super charming and cheerful.

And if you already handed fashion Neon?

Kisses
Vanessa Ponzoni

Do you know how to wash your hair properly?


In order to have clean hair, beautiful and healthy. The correct washing helps a lot to achieve incredible results.However many do not know the proper way to wash your hair. 
I did not know it, wash your hair super fast and did not know why my hair ressecado.Por lived it, I separated a few cleaning tips for you also learn and apply in their day-to-day. 

Remembering that there are several types of hair: curly, straight, wavy, dry, oily, normal, etc. dyed. Thus, what one should aim for choosing a shampoo? For example, those with colored yarns to opt for products that retain the color and which are suitable for the texture yarn? 
Adriano Almeida, tricologista: The shampoos should be chosen according to the main need of hair. A woman with dyed hair, but oily (which is rare, since the colorations usually wither) is to choose a shampoo for oily hair or even for normal hair. If not oily, no doubt, the shampoo is more appropriate for that particular dyed yarns, which have moisturizing ingredients in their formula, as the dyed hair is too dry when it becomes more susceptible to breakage. 

Switching brands of shampoos and conditioners is important. The trick to switch brands is very useful to prevent tangling and breakage of wires. Ideally, use a shampoo and conditioner in one wash and another brand the next wash, ie choose two brands of your choice and switch washes. For the hair acquires electric charge of shampoo and using always the same (no change) tends to the wire is electrified (creepy and undisciplined), which makes the hair and leaves it much more fragile. 


Step 1: Use warm or cold water to not open the scales and prevent damage to the wires. Avoid hot water; 

Step 2: Ideally, with wet hair, spread a proportionate amount of shampoo on the entire scalp, without exaggeration.If your hair is long you need to apply a little shampoo in length. The movement of the hands can be circular or claw does not matter, since the product is well distributed, but always with the fingertips never Fingernail not to harm the scalp. If irritation, the region becomes more susceptible to infections. 

Step 3: Remove excess water conditioner for use 
Note: When we hyper conditioner in your hair wet, lost product and there is good absorption of the same. 

Step 4: Apply the conditioner on the hair strands without touching the scalp. 

Step 5: Comb the hair with a comb / brush or even fingers to close the cuticles. 

Step 6: Rinse with plenty of water, removing any product. 

Step 7: After bathing, pat dry with a towel, causing it to absorb water, avoid rubbing it too, not to reopen the hair cuticles. 

Step 8: Use styling creams / Finishers or Leave em, and model according to your preference. 
Note: Finalizers treatment, as antifrizz, styling cream, cream without rinsing, serum for split ends, etc.. they protect the wires preserving the balance, health and strength. The mechanism is as follows: they act as a protective film that protects the wire against pollution and sun, and seal the edges (not all do, but most do) avoiding the fragility of the hair, But attention: the use of these products attracts particles that are invisible in the air that deposit on the wire, causing the hair to lose its gloss more easily. Therefore, anyone who uses finisher often must use deep cleansing shampoo weekly. 

Following this technique you will notice the difference in aesthetics and strengthening hair. 

Kisses

terça-feira, 5 de junho de 2012

Oily Hair-Causes and Care


If you suffer with oily hair, it is likely that you have already researched and are familiar with various methods of getting rid of them. However, it can become tedious and time consuming to constantly have to do the same things again and again. The first step is prevention, so we know what the main causes of oily hair, you will save your extra time. 

What are the main causes of greasy hair,

Styling products overuse is a major cause of oily hair. When you apply multiple products to the scalp, they begin to accumulate on top of each other, forming an accumulation (wax), oily. To prevent this buildup from happening, you should reduce the amount of products that apply to your hair at any time, and try to stay away from oil based products. If you have the points for dry hair, it is good to apply oil to the ends of your hair, but keep the product away from your scalp. 


Hormones are another major cause of oily hair. If you are a teenager or have just entered menopause, you may be experiencing an increase in androgens, the male hormone. These androgens are responsible for an increase in oil production in your skin and scalp, resulting in acne on your face and body, along with oily hair.Physicians typically be prescribed progesterone to control the level of androgens and thus reduce the amount of oil that is produced. 

Brush your hair often, due to the fact that you are transferring oils from your scalp to the rest of your hair. When brushing your hair is important, try to limit the number of strokes so you do not distribute the oils from the scalp. 

Food, malnutrition is another major cause of oily hair. If you are consuming too many fatty foods, oils, and foods that are heavy with preservatives, it can also cause excessive production of oils in your scalp. Aim for healthier foods such as fish and fresh fruits and vegetables, as well as vitamins and minerals, which in turn helps reduce the accumulation of oil on the scalp. 


  • To have beautiful hair with plenty of life is to wash every day and make use of the products listed, had to make some moisturizing every fifteen days.


Some shampoos recommended to control oily hair:

Vizcaya Botanique oily hair. In addition to deep clean the wires, its formulation removes all oils from your locks. 

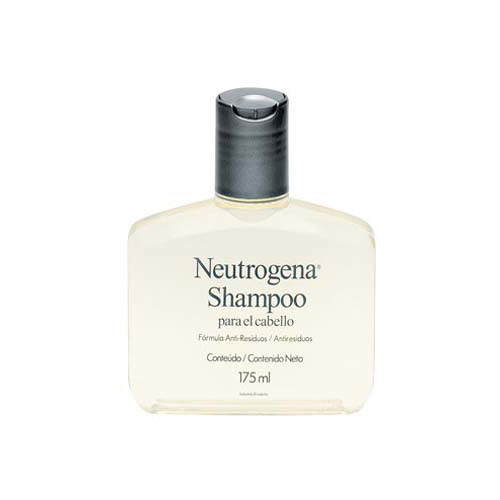
hampoo with anti-waste removes only a single application of 70% to 90% of waste accumulating the continued use of other shampoos, conditioners, mousses and terminators. Used once a week (maximum), revitalizes the hair and increases the effectiveness of your favorite shampoo.

Citric fresh silk. This shampoo is a very cheap and can be found at any pharmacy, perfume, or supermarket. He cleaned the wires and leaves a feeling of freshness. 

Herbal Essences Drama Clean. With a smell very nice, clean and leaves hair with shine and softness. Its main advantage is that it leaves your hair hydrated and alive.


Now that you are aware of the main causes of oily hair, you can take the necessary measures to avoid the greasy hair on the scalp, and have a beautiful, healthy hair! 

I hope you enjoyed today's tip!
kisses

Plush Nails - Learn how to make and enter this fashion you too!

New ideas for nail art are constantly emerging. 
After the novelty of the last nails Caviar (see story here) . 
The newest release is the nail or nails plush terry. 
This art is a great choice for winter! although you can abuse the more vibrant colors as well. 

And to make it clear that contrary to what many think, this is a nail in suede, are not "hair" that will drop in food irritate the nose etc ... 

So ready to get your hands dirty? Or rather the flakes? Hehehehehehe 


Come on! 

You will need: 

Flocking powder - nail plush, available at any craft store or online. 
Enamel color of your choice 
Nail Base 
One page folded for ease of use for a quick and clean up 

Step 1: Ecolher enamel to be used, try to combine the glaze with the color of the flakes. 
Step 2: Paint your nail with a nail polish choice. One hand is sufficient, but two passes, if you prefer. 
Step 3. While the glaze is still wet press it firmly in the dust. 
Step 4: With your finger, firmly push the dust collecting your nail, do not try to roll it or smudge the edges. 
Step 5: Blow off excess powder, a nail brush can be used to clean up. 
Step 6: If the result is a little uneven, you can press it again to dust. 
Step 7: Repeat on your other nine nails! 
Step 8: Close the ends of your nails with a transparent top layer, but do not forget to do it at the base of the nail. 
Step 9: Shout loud "They are so SOFT" hehehehehehe 


Once dry, clean the corners of the nails and then wash your hands to remove excess product that has not fixed.The method for making the material of the nail is normal, just apply cotton soaked in nail polish remover or acetone. 

To each of the drawings also if you prefer to descontair. 


Beijoss

I'm short. How to wear boots?

Hi girls and boys, lol. Okay? 

So today I'll talk about the incredibly low and their fights with boots lol. 

Small women can wear boots? Yes, they CAN! 


So, same as I'm short, and friends have incredibly low, they do not know how to use the boots this winter I'll give a brief statement without a mistake for us to use 


But follow these instructions which are suuuuuper important not to err on the purchase boots ok? 

Important Guidelines: 


* Boots should be medium or short-barreled, boots with long barrel is disproportionate to the length of the legs. 

* It is good that the tone of the boot is similar to the pants (or half) because that lengthens the legs and refines the silhouette. So invest in black boots and dark pants with brown boots and let more light to wear with beige pants.(Remember, always like tones.) 

* Buy boots with heels half foot or high heels. 

* They are the best models fitted in the leg. Why stick with the boot "dancing" in the leg, come and admit this is horrible right? rs. Also, does the woman look lower. 

* Do not let your pants get tangled in the boot, so the best option is to use skinny jeans. 


Dress can boot with?

Yes, sure can!
But a better knack of using his boot to wear with dress dress is short, and can also be used with pantyhose. If you want to stretch, use the half in the same tone of costume.


Hey girls and boys enjoyed?
So have questions or suggestions? Leave a comment or send by twitter @ pontosdabeleza

Decoupage Tutorial on Shoes

Hi girls and boys all right? 

So today I was on facebook, and saw this magnificent super shoe, and I decided to research more about decoupage and how this type of shoe and I found that it can be done in tennis too, is not that great? rs. 


So flowers from my garden is the following, I will put all the step by step here for you a technique that a friend of mine taught me. E type is super easy, I'll do in my white sneakers (I have a 4) rs.

Good to go step by step.

YOU WILL NEED:

1-1 pair of tennis shoes or white
2 - Paper Napkin Decoupage designed
3 - decoupage glue for outdoor OR fabric glue varnish
4 - Scissors
5 - Wall Sandpaper Sandpaper OR nail
6 - Matte Varnish
7 - Brush

HOW TO DO:

Cut the drawing part of the napkin that you want to put on shoes or shoe.

Remove the two white film that has behind him.

Spread glue all over the fabric as if you were painting it, do not leave without glue because it will cause a bubble that you can use to rip or break the design.

Always start at the corners it is easier, even if it's like the people who are just learning right? rs.

Get the the stepwise process, a dab of glue on a piece and go pasting the paper, with mita calm because it is very thin and is easy to tear.

Go tapping his fingertips gently over the design to get pricing.

After finishing the collage, with the same brush you used, again with the same glue on top of the drawing. * Carefully to make sure it went through the entire design.

This almost ready your shoe, let it dry for about 72 hours or 3 days.

When the past 72 hours, skip the glaze over with the brush, to shine in the design of the shoe. let dry for 24 hours (1 day).

And then, after 82 hours equivalent to 4 days you can now use your custom shoe.


* Super important tip: The shoe or shoes should be white, to get the color and design, because it does not get colorful 


Have questions, complaints, suggestions?

So comments that we come in contact with you shortly.

Stay with God to the next.

quinta-feira, 26 de abril de 2012

How to Care before, during and after the tattoo


Before the tattoo:
Mummies found in ancient Egypt with traces and inscriptions in the abdomen prove that fashion is designed to have the old skin. The Egyptians used the tattoo to differentiate between tribes, to mark important events and foremost as a religious act. Even after more than five thousand years - and after two prohibitions, one in the 8th century, by papal decree and another in the 20th century, New York, the technique of puncturing the dermis with needles full of ink has hardly changed.
What changed is the skin care and hygiene. The rules to prevent infections, allergies and contamination are essential to make the procedure safer. The tattoo artist Edgard Ghilardi Junior, known as Dada, Dada's Tattoo Studio, reinforces this idea and says that one must be very careful when choosing the tattoo parlor. "Check if the environment is in accordance with the rules of hygiene, see photos of work done and talk to the artist it is important to be able to choose the right professional," says Given.
Tattoo Studios undergo an annual inspection of the National Health Surveillance Agency (ANVISA),where the structure is checked and asepsis of the establishment, so always ask for the license of operation of such sites. Inks, needles and accessories must also be registered health. Henrique Mattos, of New Wind Tattoo tattoo artist looks to take responsibility in deciding who will leave a permanent mark on your skin is essential to avoid future problems.
During the tattoo:
Once you have chosen the studio and the professional, it's time to feel the needles into the skin. But before you watch the tattooist wash hands with water, soap and alcohol 70% before the procedure. Even with hands washed, it is essential to use gloves. The skin area where the tattoo is made must also be washed and applied alcohol to total disinfection.
The needles will be used should be discarded after use, so it requires that the professional open the package in front, so you can be sure that it has not yet been used. Also make sure that the studio sterilize non-disposable materials, such as the tip of the machine where the needle is inserted. Sterilization should be performed in an autoclave (device that uses pressure to sterilize surgical materials), where the probe should be left for approximately 40 minutes, the second view. Before sterilization is necessary to wash the toe tap water with a brush and put it in an ultrasonic tub for 30 minutes. Then it is necessary to leave it in a container with specific chemicals for cleaning surgical specimens 2-24 hours. After this period, the toe is to be enveloped and taken to the autoclave.
The ink to be used should be placed in small cups and what remains must be discarded, and can never be reused in another tattoo. Henry warns that the ink also has contact with the blood and can transmit diseases, if shared.
Allergic reactions to ink can happen, but are not common. Given that states can not diagnose whether or not this will occur. "There are no tests that prove the allergy, so care should be taken to see how the skin reacts," says the artist. According to Henry, the colors with the highest possibility of hypersensitivity are the red and blue. "They have in their pigmentation larger amount of iron and mercury, which end up being more likely to develop allergies," says Henry. If you find that you are leaving a lot of discharge and redness of the tattoo does not diminish, look for a dermatologist.
After the tattoo:
The most important part of the tattoo is healing. Edgard remember that success depends not only professional but also care that the client is made after the tattoo. "For a beautiful job, 50% of the responsibility is mine and is 50% of the customer," he says.
Henry emphasizes the importance of care at that stage and gives some tips at the time of healing:
Cancel the gym and do not make physical efforts for at least two weeks after the procedure. "If the tattoo has cone, exercise can make it crack and design may be missed," says Henry.
- Always wash with liquid soap and water, removing all traces of blood and secretion, even if it hurts.
- After washing, make a dressing with plastic film (used for food packaging). "In addition to protecting the tattooed area, the plastic film also prevents the secretion dries and forms very thick bark. It also helps in cleaning hours," says Henry. This dressing should be done until the third or fourth day after the procedure.
- Do not eat too much fatty and forget shrimp and pork. "These foods increase the likelihood of a person developing hypersensitivity and delay the healing time," says the artist.
- Polishes healing can be passed over the skin, but always in small quantities (it should be transparent), but Henry says that the ointment is not an essential part of healing. "The skin reacts to its own hurt and alone can answer," he says.
By no means remove the cone or scratch your tattoo, if you do the design may be faulty.
- Always use sunscreen on tattoos. "It ensures that the colors are vivid and perfect design," concludes Henry.

Love, hope you enjoyed the tips, stay with God to the next.